Tuesday, February 20, 2018

File uploading

You may have a requirement in which you want your site visitors to upload a file on your server. Rails makes it very easy to handle this requirement. Now we will proceed with a simple and small Rails project.
As usual, let's start off with a new Rails application called testfile. Let's create the basic structure of the application by using simple rails command.
tp> rails new testfile
Before starting application development, we should install gem files as shown below −
gem install carrierwave
gem install bootstrap-sass
Open up your gemfile and add the following two gems at the bottom as shown in the following image −
GEM
After adding gems in the gem file, we need to run the following command on the console −
bundle install

Creating the Model

We need to create a model with two strings as name and attachment as shown below −
rails g model Resume name:string attachment:string
We need to create the database migration as shown below −
rake db:migrate
We need to generate the controller as shown below −
rails g controller Resumes index new create destroy
Great! Now we have the basic structure set up. Now we need to create an uploader. An Uploader came from carrierwave gem and it tells to carrierwave how to handle the files. In short, it contained all file processing functionalities. Run the command to create an uploader as shown below
rails g uploader attachment
Now open the resume model and call the uploader as shown below. Resume model has placed at app/models/resume.rb −
class Resume < ActiveRecord::Base
   mount_uploader :attachment, AttachmentUploader # Tells rails to use this uploader for this model.
   validates :name, presence: true # Make sure the owner's name is present.
end
Before working on controller, we need to modify our config/routes.db as shown below −
CarrierWaveExample::Application.routes.draw do
   resources :resumes, only: [:index, :new, :create, :destroy]
   root "resumes#index"
end
Lets us edit the controller as shown below.
class ResumesController < ApplicationController
   def index
      @resumes = Resume.all
   end
   
   def new
      @resume = Resume.new
   end
   
   def create
      @resume = Resume.new(resume_params)
      
      if @resume.save
         redirect_to resumes_path, notice: "The resume #{@resume.name} has been uploaded."
      else
         render "new"
      end
      
   end
   
   def destroy
      @resume = Resume.find(params[:id])
      @resume.destroy
      redirect_to resumes_path, notice:  "The resume #{@resume.name} has been deleted."
   end
   
   private
      def resume_params
      params.require(:resume).permit(:name, :attachment)
   end
   
end
Let's add bootstrap implementation in css file.css file could be in app/assets/stylesheets/resumes.css.scss
@import "bootstrap";
Now open up app/views/layouts/application.html.erb and add codes as shown below −
<!DOCTYPE html>
<html>
   
   <head>
      <title>Tutorialspoint</title>
      <%= stylesheet_link_tag "application", media: "all", "data-turbolinks-track" => true %>
      <%= javascript_include_tag "application", "data-turbolinks-track" => true %>
      <%= csrf_meta_tags %>
   </head>
   
   <body>
      <div class = "container" style = "padding-top:20px;">
         <%= yield %>
      </div>
   </body>

</html>
Now we need to set up index views as shown below −
<% if !flash[:notice].blank? %>
   <div class = "alert alert-info">
      <%= flash[:notice] %>
   </div>
<% end %>

<br />

<%= link_to "New Resume", new_resume_path, class: "btn btn-primary" %>
<br />
<br />

<table class = "table table-bordered table-striped">
   <thead>.
      <tr>
         <th>Name</th>
         <th>Download Link</th>
         <th> </th>
      </tr>
   </thead>
   
   <tbody>
      <% @resumes.each do |resume| %>
         
         <tr>
            <td><%= resume.name %></td>
            <td><%= link_to "Download Resume", resume.attachment_url %></td>
            <td><%= button_to "Delete",  resume, method: :delete, class: "btn btn-danger", confirm: "Are you sure that you wish to delete #{resume.name}?" %></td>
         </tr>
         
      <% end %>
   </tbody>
   
</table>
Now, lets edit new.html.erb and add our form code.
<% if !@resume.errors.empty? %>
   <div class = "alert alert-error">
      
      <ul>
         <% @resume.errors.full_messages.each do |msg| %>
            <li><%= msg %></li>
         <% end %>
      </ul>
      
   </div>
<% end %>

<div class = "well">
   <%= form_for @resume, html: { multipart: true } do |f| %>
      <%= f.label :name %>
      <%= f.text_field :name %>
      <%= f.label :attachment %>
      <%= f.file_field :attachment %>
      <%= f.submit "Save", class: "btn btn-primary" %>
   <% end %>
</div>
Now start the server and visit http://localhost:3000. It will produce a screen similar to as follows −
Output
One last thing we need to do is filter the list of allowed filetypes. For that we need add simple code as shown below at app/uploaders/attachment_uploader.rb
class AttachmentUploader < CarrierWave::Uploader::Base
   storage :file
   
   def store_dir
      "uploads/#{model.class.to_s.underscore}/#{mounted_as}/#{model.id}"
   end
   
   def extension_white_list
      %w(pdf doc htm html docx)
   end
end
Now start the server and visit http://localhost:3000. Now input a wrong format; it will generate a wrong message as shown below −
Sunday, February 4, 2018

AJAX

Ajax stands for Asynchronous JavaScript and XML. Ajax is not a single technology; it is a suite of several technologies. Ajax incorporates the following −
  • XHTML for the markup of web pages
  • CSS for the styling
  • Dynamic display and interaction using the DOM
  • Data manipulation and interchange using XML
  • Data retrieval using XMLHttpRequest
  • JavaScript as the glue that meshes all this together
Ajax enables you to retrieve data for a web page without having to refresh the contents of the entire page. In the basic web architecture, the user clicks a link or submits a form. The form is submitted to the server, which then sends back a response. The response is then displayed for the user on a new page.
When you interact with an Ajax-powered web page, it loads an Ajax engine in the background. The engine is written in JavaScript and its responsibility is to both communicate with the web server and display the results to the user. When you submit data using an Ajax-powered form, the server returns an HTML fragment that contains the server's response and displays only the data that is new or changed as opposed to refreshing the entire page.
For a complete detail on AJAX you can go through our AJAX Tutorial

How Rails Implements Ajax

Rails has a simple, consistent model for how it implements Ajax operations. Once the browser has rendered and displayed the initial web page, different user actions cause it to display a new web page (like any traditional web application) or trigger an Ajax operation −
  • Some trigger fires − This trigger could be the user clicking on a button or link, the user making changes to the data on a form or in a field, or just a periodic trigger (based on a timer).
  • The web client calls the server − A JavaScript method, XMLHttpRequest, sends data associated with the trigger to an action handler on the server. The data might be the ID of a checkbox, the text in an entry field, or a whole form.
  • The server does processing − The server-side action handler ( Rails controller action )-- does something with the data and returns an HTML fragment to the web client.
  • The client receives the response − The client-side JavaScript, which Rails creates automatically, receives the HTML fragment and uses it to update a specified part of the current page's HTML, often the content of a <div> tag.
These steps are the simplest way to use Ajax in a Rails application, but with a little extra work, you can have the server return any kind of data in response to an Ajax request, and you can create custom JavaScript in the browser to perform more involved interactions.

AJAX Example

This example works based on scaffold, Destroy concept works based on ajax.
In this example, we will provide, list, show and create operations on ponies table. If you did not understand the scaffold technology then we would suggest you to go through the previous chapters first and then continue with AJAX on Rails.

Creating An Application

Let us start with the creation of an application It will be done as follows −
rails new ponies
The above command creates an application, now we need to call the app directory using with cd command. It will enter in to an application directory then we need to call a scaffold command. It will be done as follows −
rails generate scaffold Pony name:string profession:string
Above command generates the scaffold with name and profession column. We need to migrate the data base as follows command
rake db:migrate
Now Run the Rails application as follows command
rails s
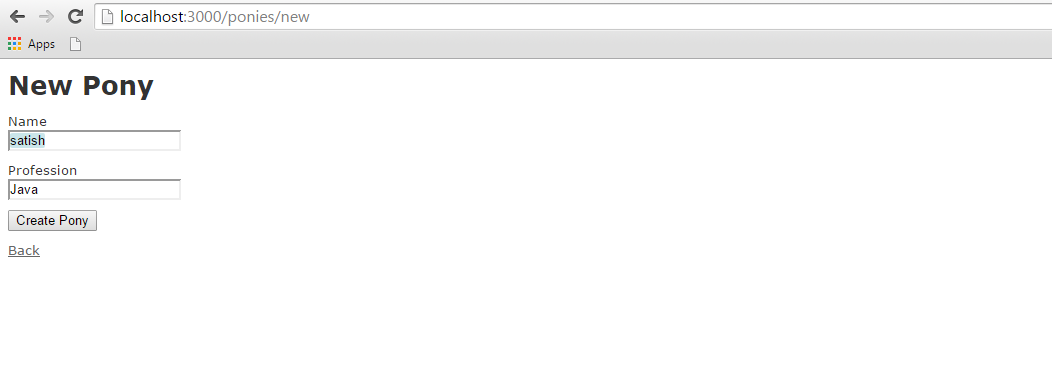
Now open the web browser and call a url as http://localhost:3000/ponies/new, The output will be as follows
Ajax

Creating an Ajax

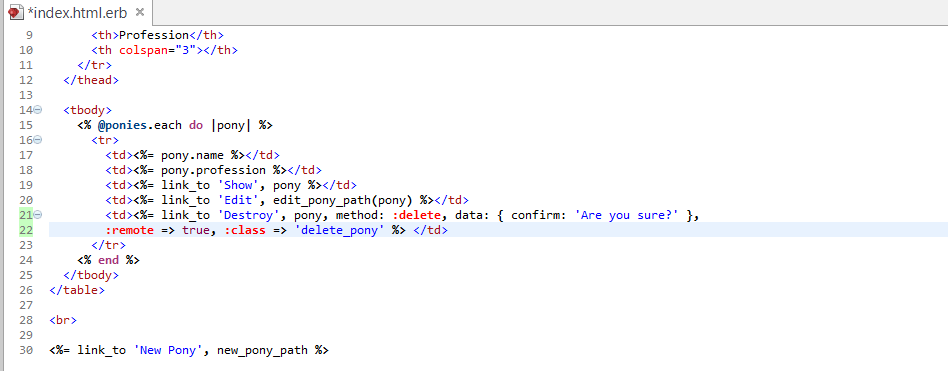
Now open app/views/ponies/index.html.erb with suitable text editors. Update your destroy line with :remote => true, :class => 'delete_pony'.At finally, it looks like as follows.
Ajax
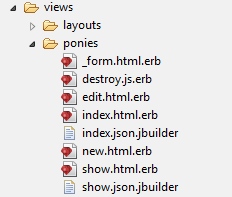
Create a file, destroy.js.erb, put it next to your other .erb files (under app/views/ponies). It should look like this −
Ajax
Now enter the code as shown below in destroy.js.erb
$('.delete_pony').bind('ajax:success', function() {
   $(this).closest('tr').fadeOut();
});
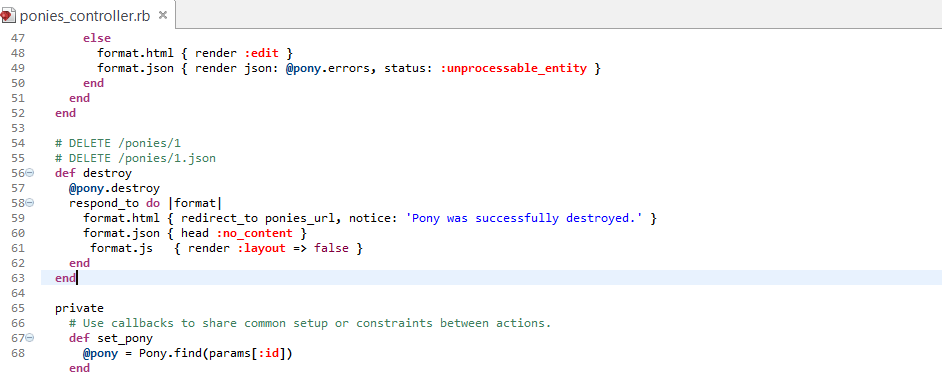
Now Open your controller file which is placed at app/controllers/ponies_controller.rb and add the following code in destroy method as shown below −
# DELETE /ponies/1
# DELETE /ponies/1.json
def destroy
   @pony = Pony.find(params[:id])
   @pony.destroy
   
   respond_to do |format|
      format.html { redirect_to ponies_url }
      format.json { head :no_content }
      format.js   { render :layout => false }
   end
   
end
At finally controller page is as shown image.
Ajax
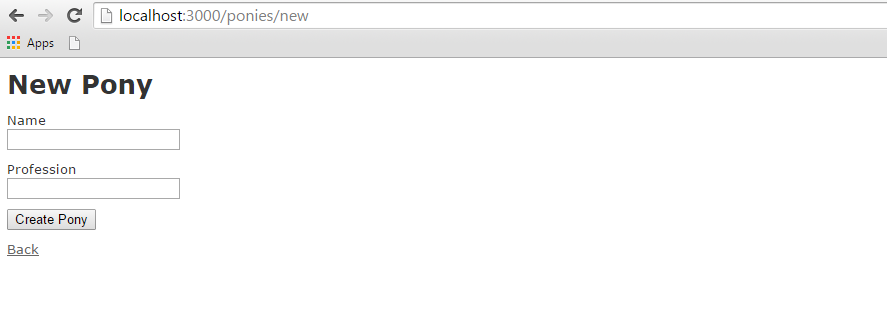
Now run an application, Output called from http://localhost:3000/ponies/new, it will looks like as following image
Ajax
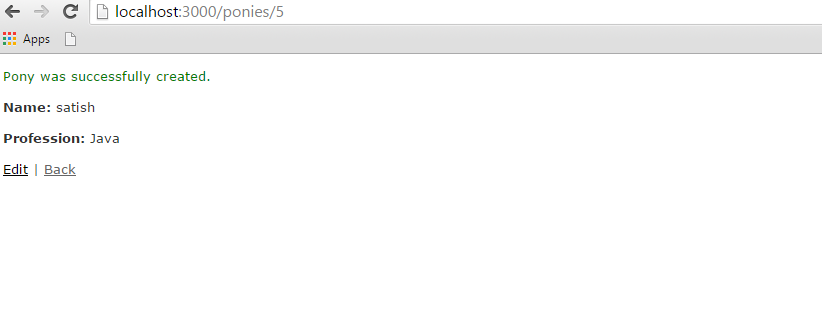
Press on create pony button, it will generate the result as follows
Ajax
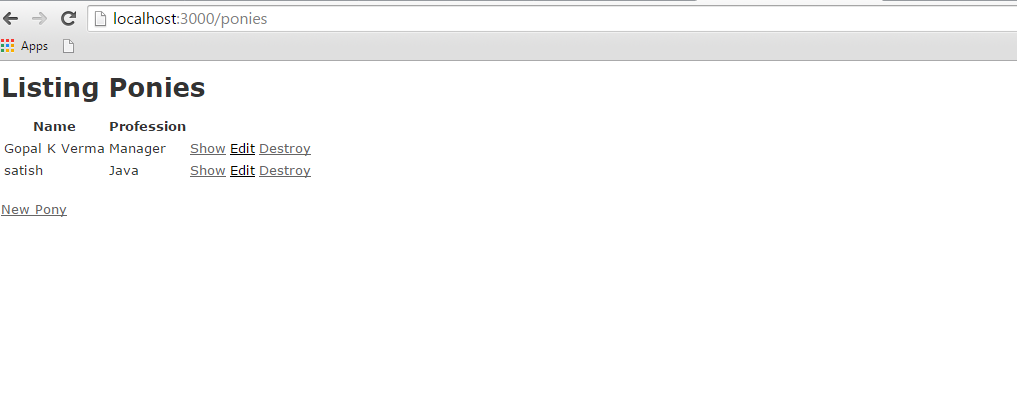
Now click on back button, it will show all pony created information as shown image
Ajax
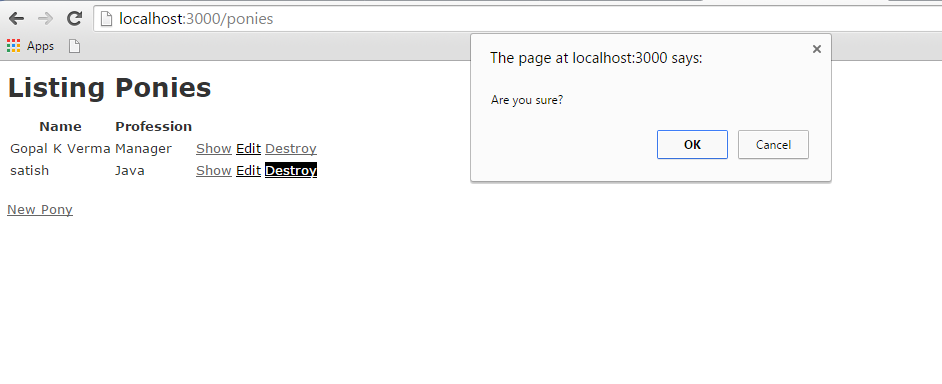
Till now, we are working on scaffold, now click on destroy button, it will call a pop-up as shown below image, the pop-up works based on Ajax.
Ajax
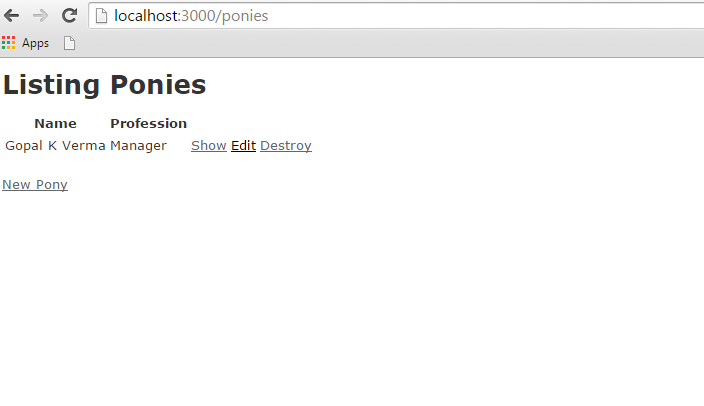
If Click on ok button, it will delete the record from pony. Here I have clicked ok button. Final output will be as follows −
Ajax